User Report
User Report
Overview:
User Reports can be set up to monitor a user's status inside an organization. Different areas of the user's activity can be tracked such as MFA status, roles assigned to them, and the tenants they have chosen. The fields to be included in the reports and the schedule for when the reports are to be emailed can be configured with this setting. This configuration can be done from the Manage Reports Setting. The reports can be configured to be either in Excel, CSV or JSON format. These emails will contain the Excel,CSV or JSON reports as attachments.
Assigning User Reports Manager Permission:
Note: You must assign the User_Reports_Manager permission in order to configure the User Report.
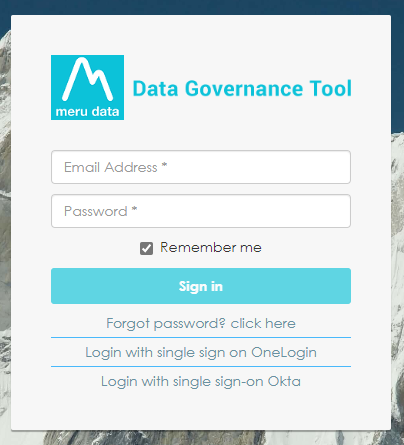
Log in to your Data Governance Tool account.
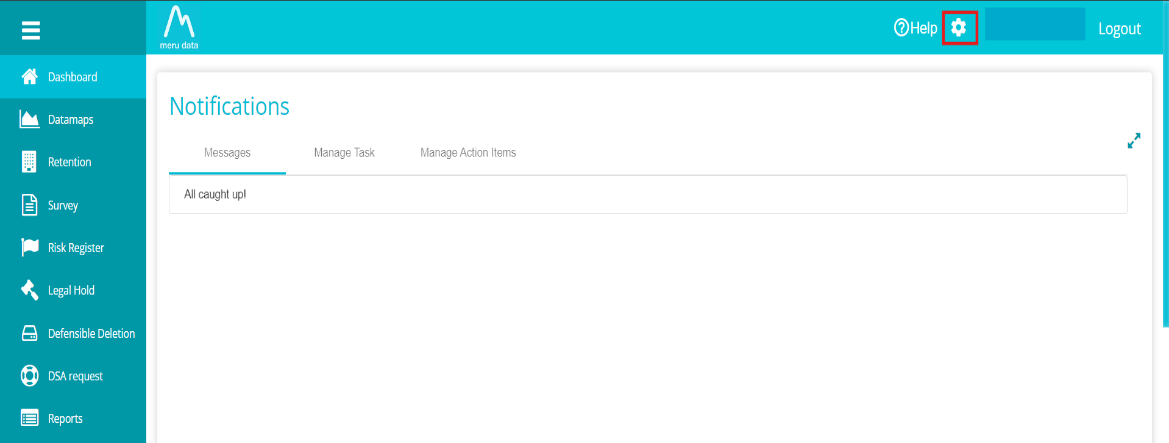
Click on settings icon
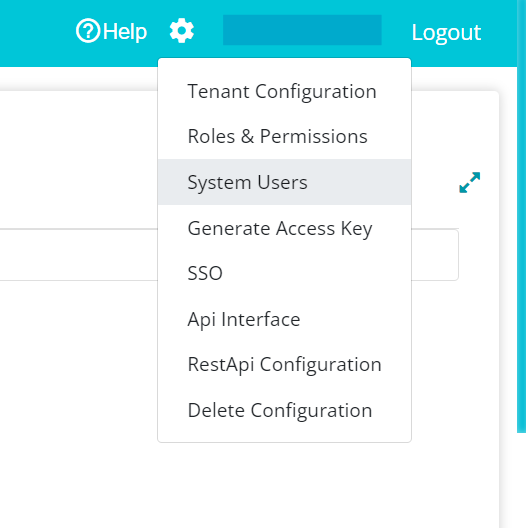
Click on System Users
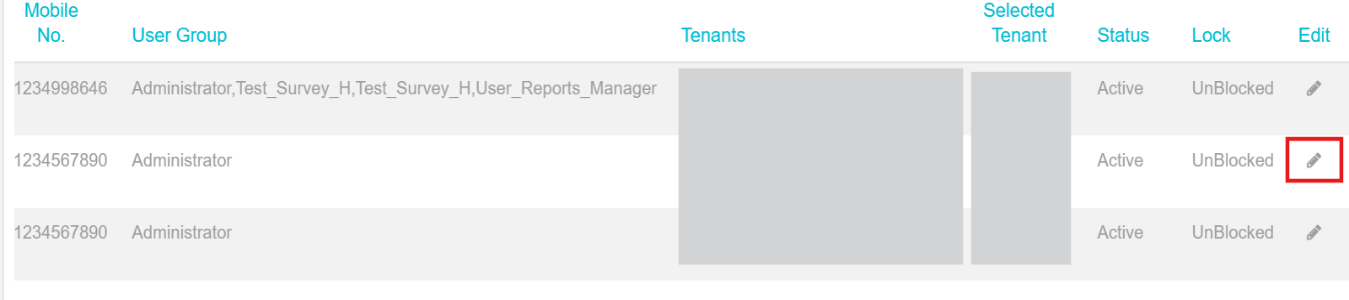
Search for the user whom you need to assign the permission.

Click on the edit icon against the user you searched in the search bar.
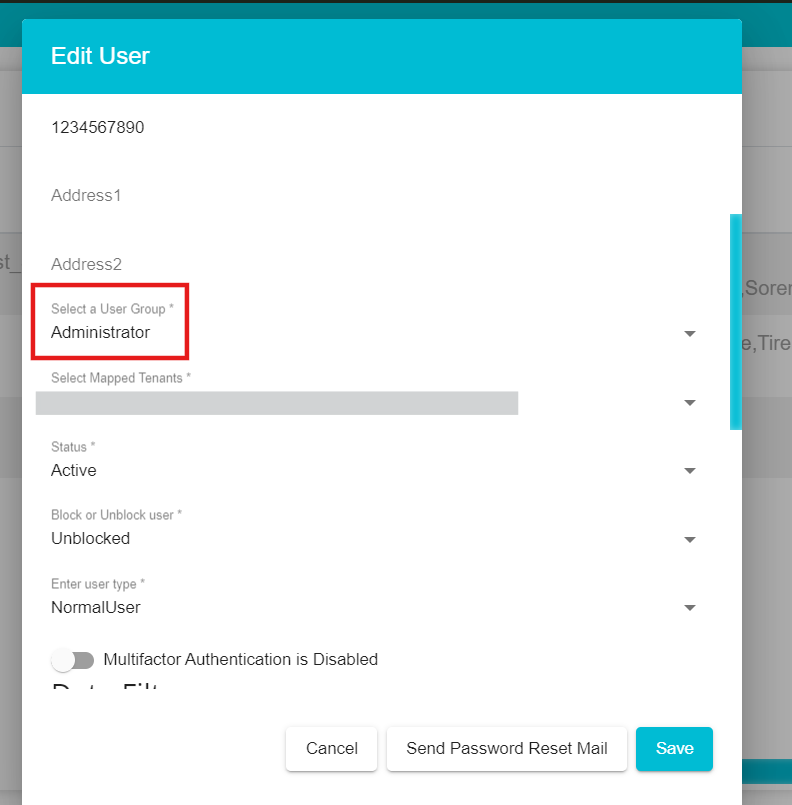
In the Edit User Screen navigate to Select a User Group.
Click the Select a User Group dropdown, then look for User_Reports_Manager and check the box next to it.
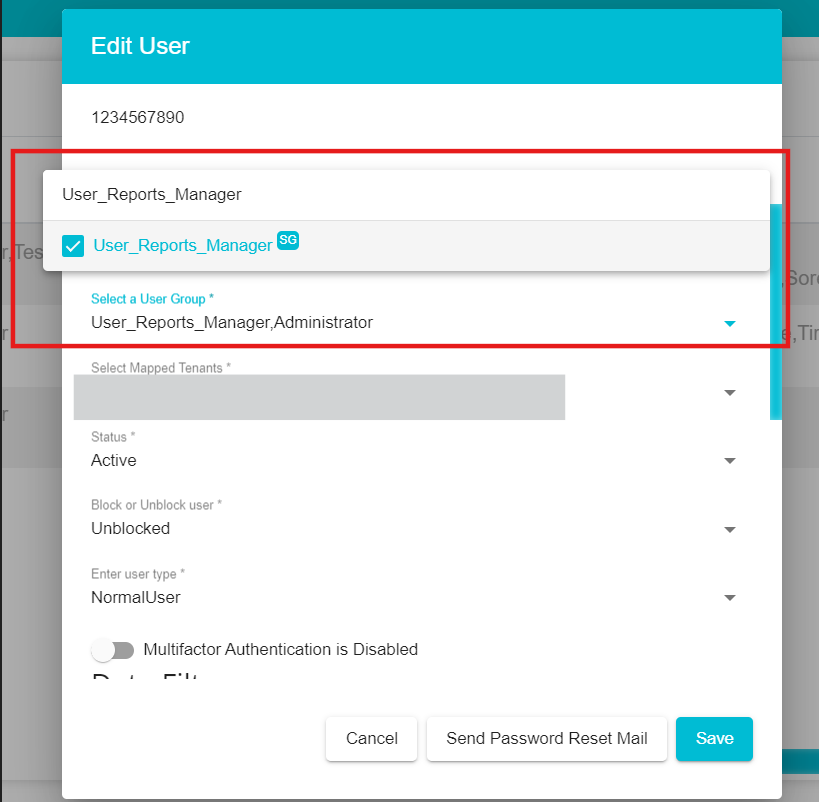
Click on Save

Creating a User Report:
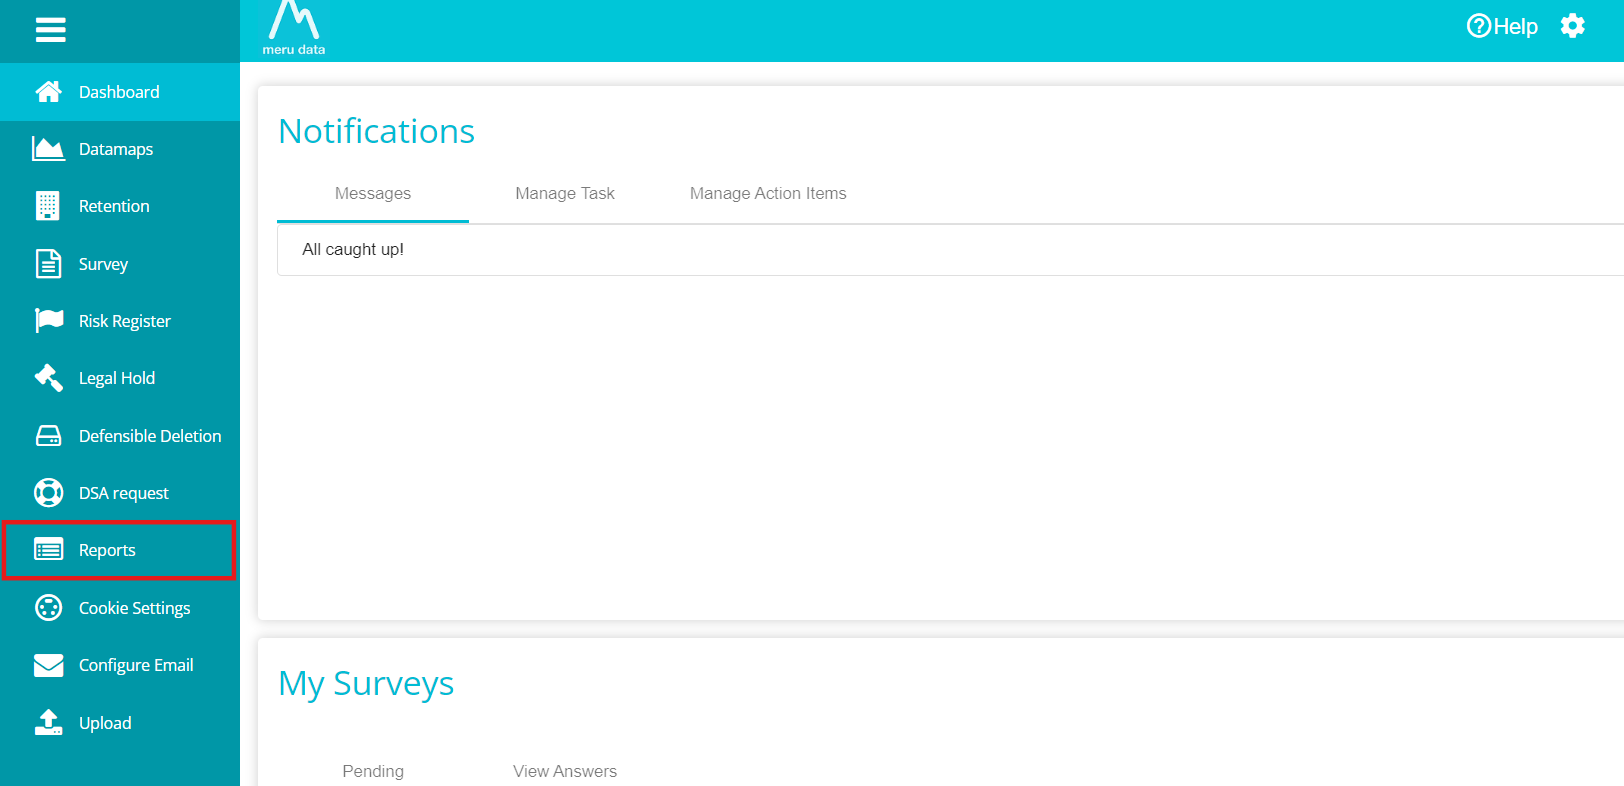
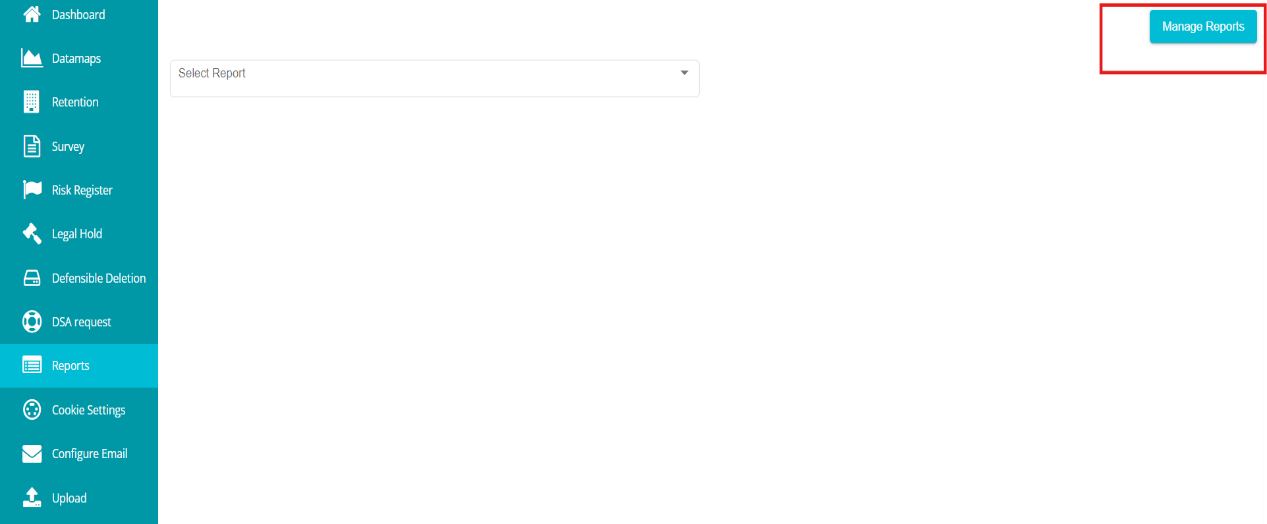
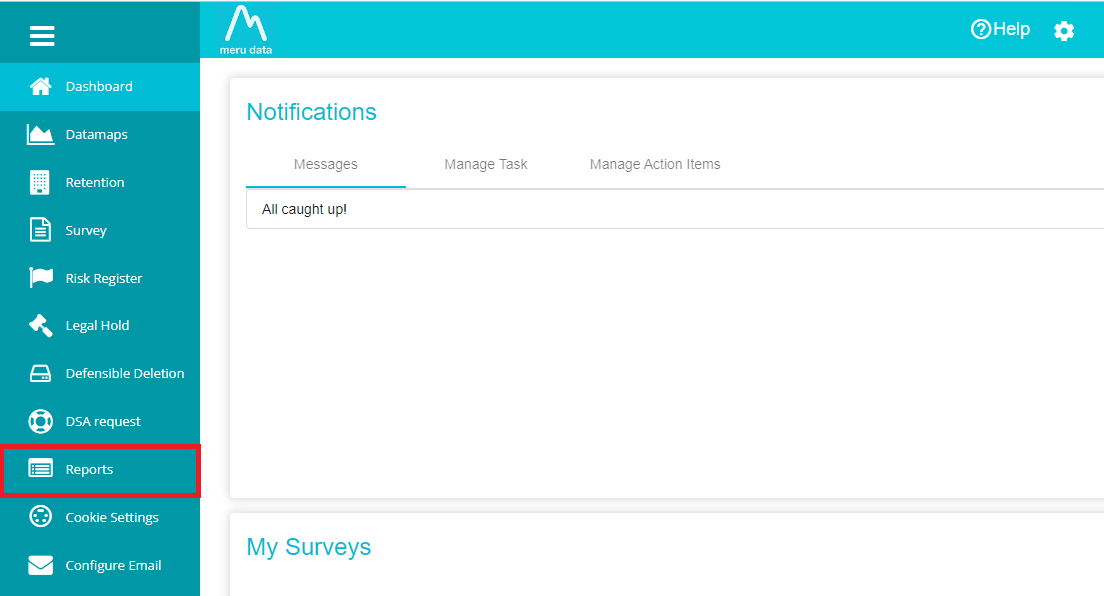
From the hamburger menu present on the top left corner of the Dashboard, click on Reports.
Click on Reports and then click on Manage Reports.
From the Manage Reports Click on Custom-defined.
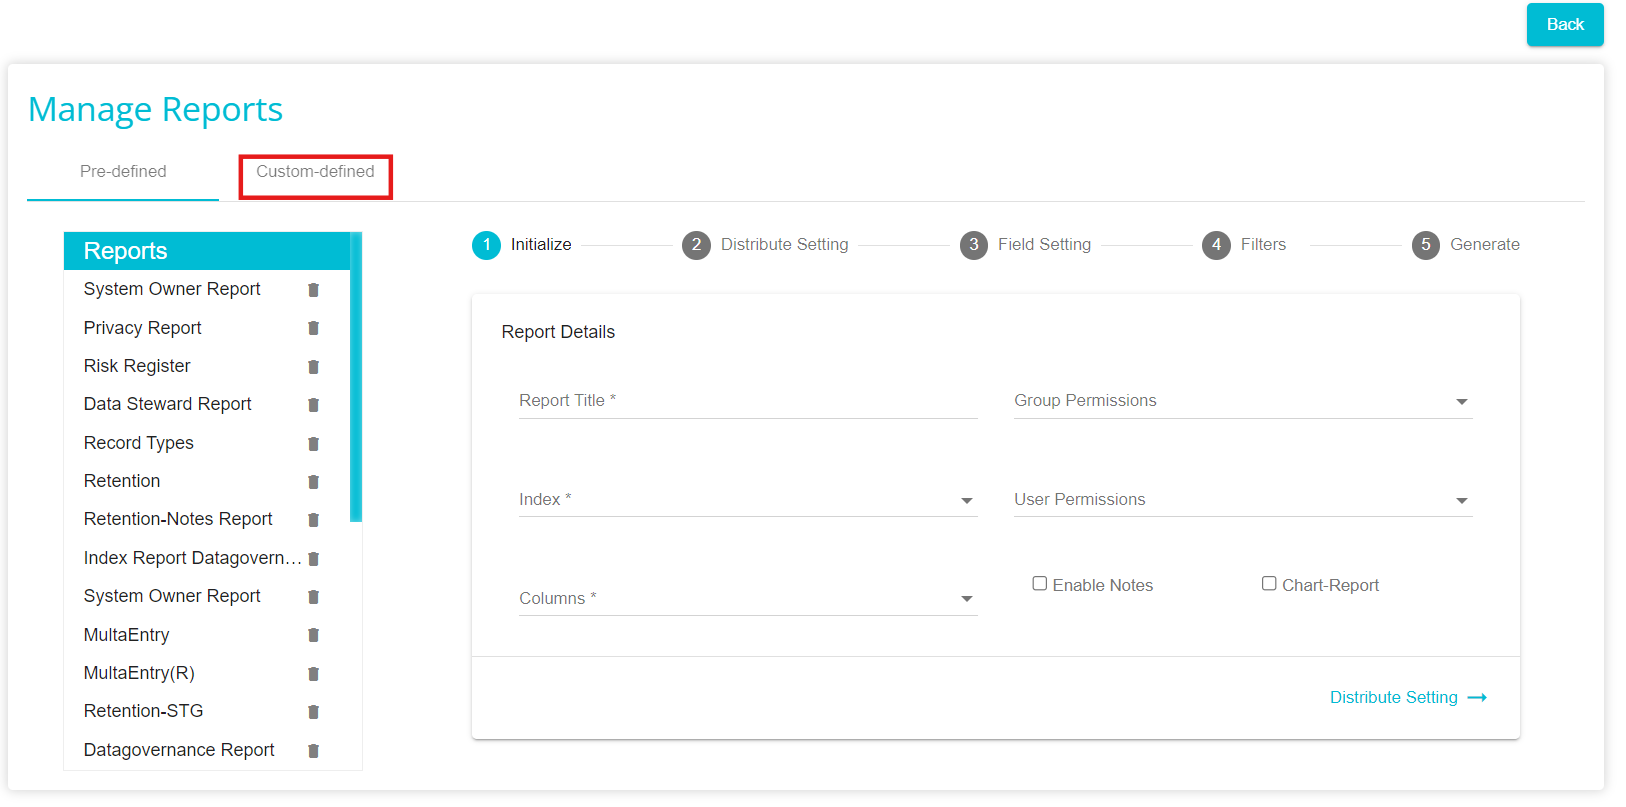
Once the Custom-defined tab is selected, the first section is the initialize section, under the initialize section add the User Report Details.
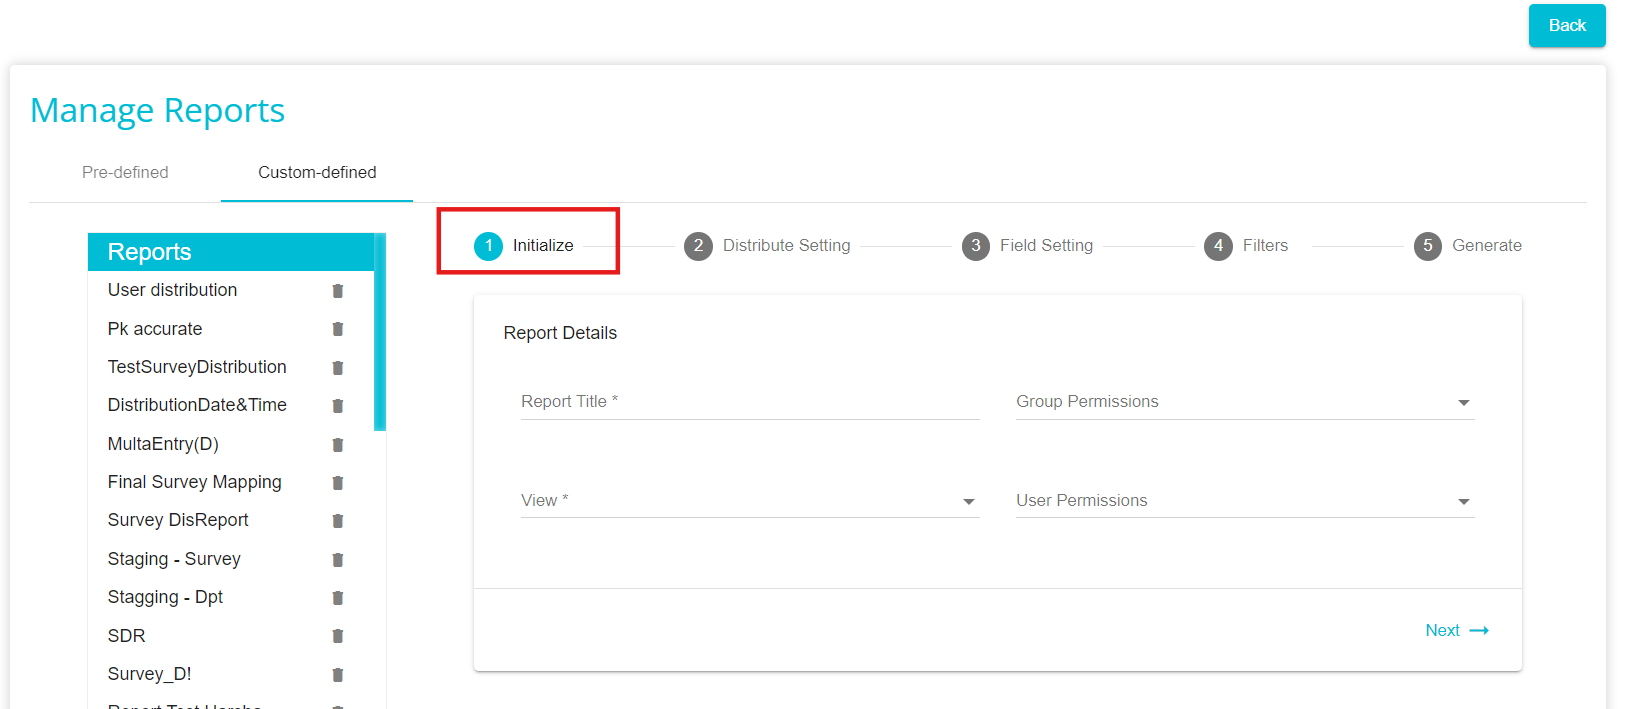
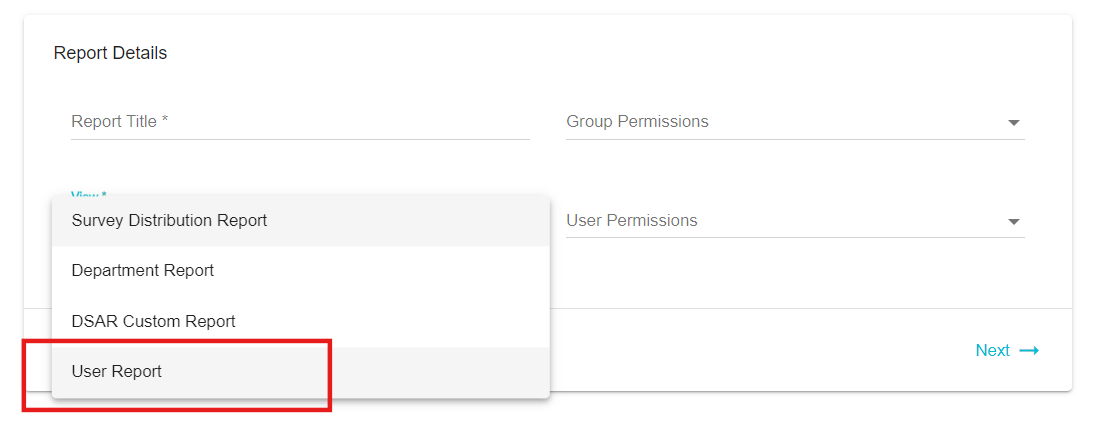
Report Title: Add a Custom Title to the Report.
View: From the drop-down menu, select User Report.
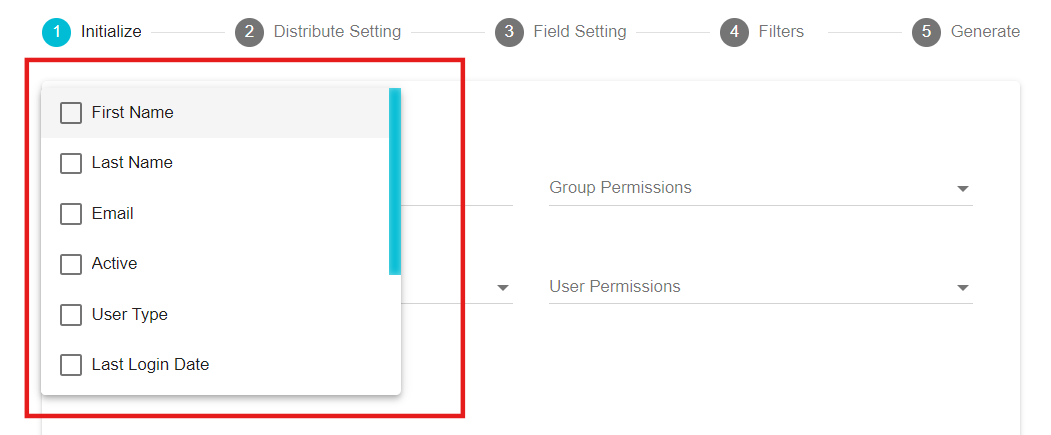
Columns: Once User Report has been selected, from the Columns drop-down menu select the columns/fields to be included in the Report. The list of columns to be included are the details of the user like First Name, Last Name, Email, Active, User Type, Last Login Date, MFA Enabled, Roles, Mapped Tenant Identifiers and Selected Tenant.
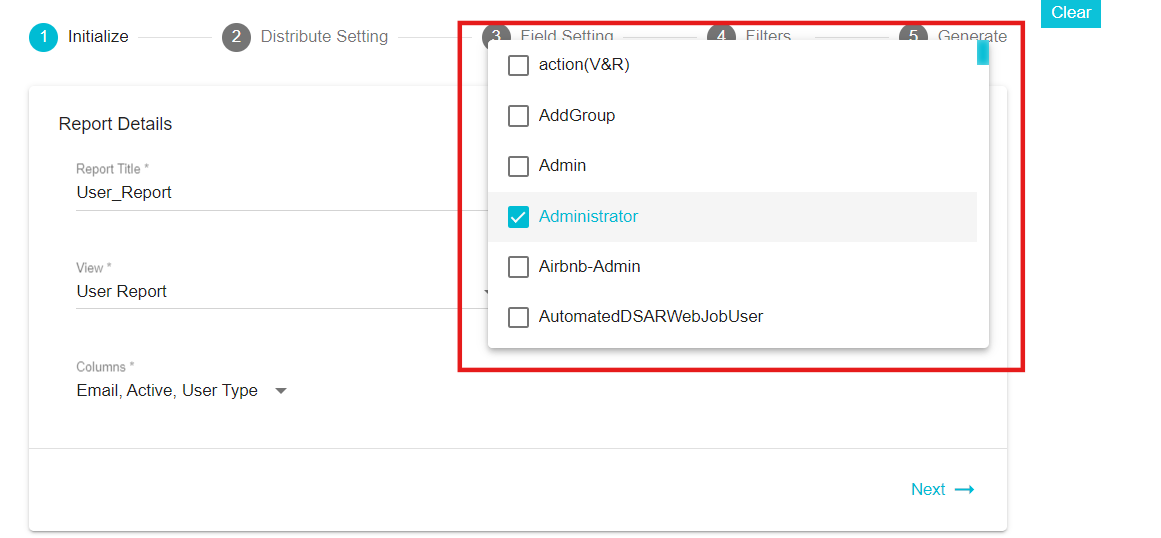
Group Permissions: From the drop-down menu, select the groups to which this Report should be made available. The report will be visible in the Reports module for the selected user groups.
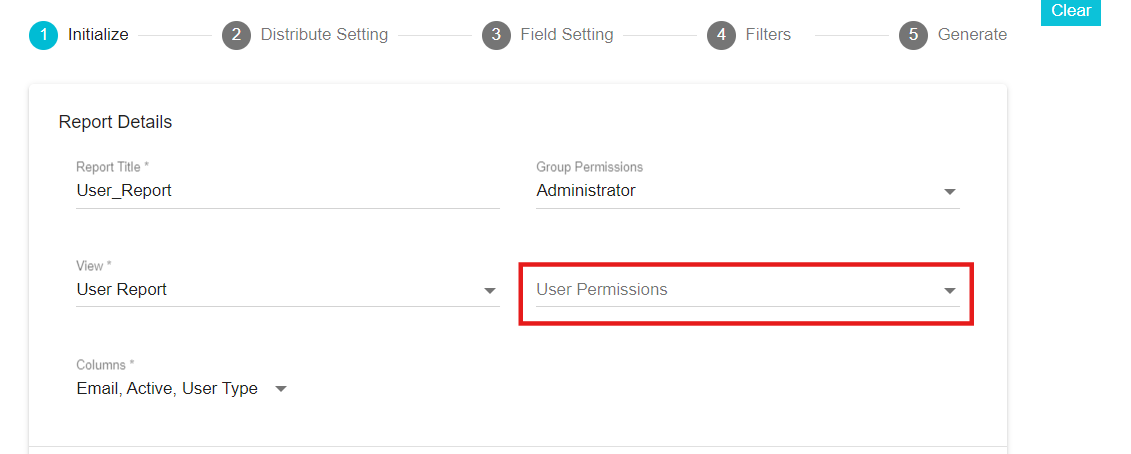
User Permissions: This feature works similar to Group permissions. From the drop-down menu, select the users to which this Report should be made available. The report will be visible in the Reports module for the selected users.
Next navigate to the Distribute Settings section
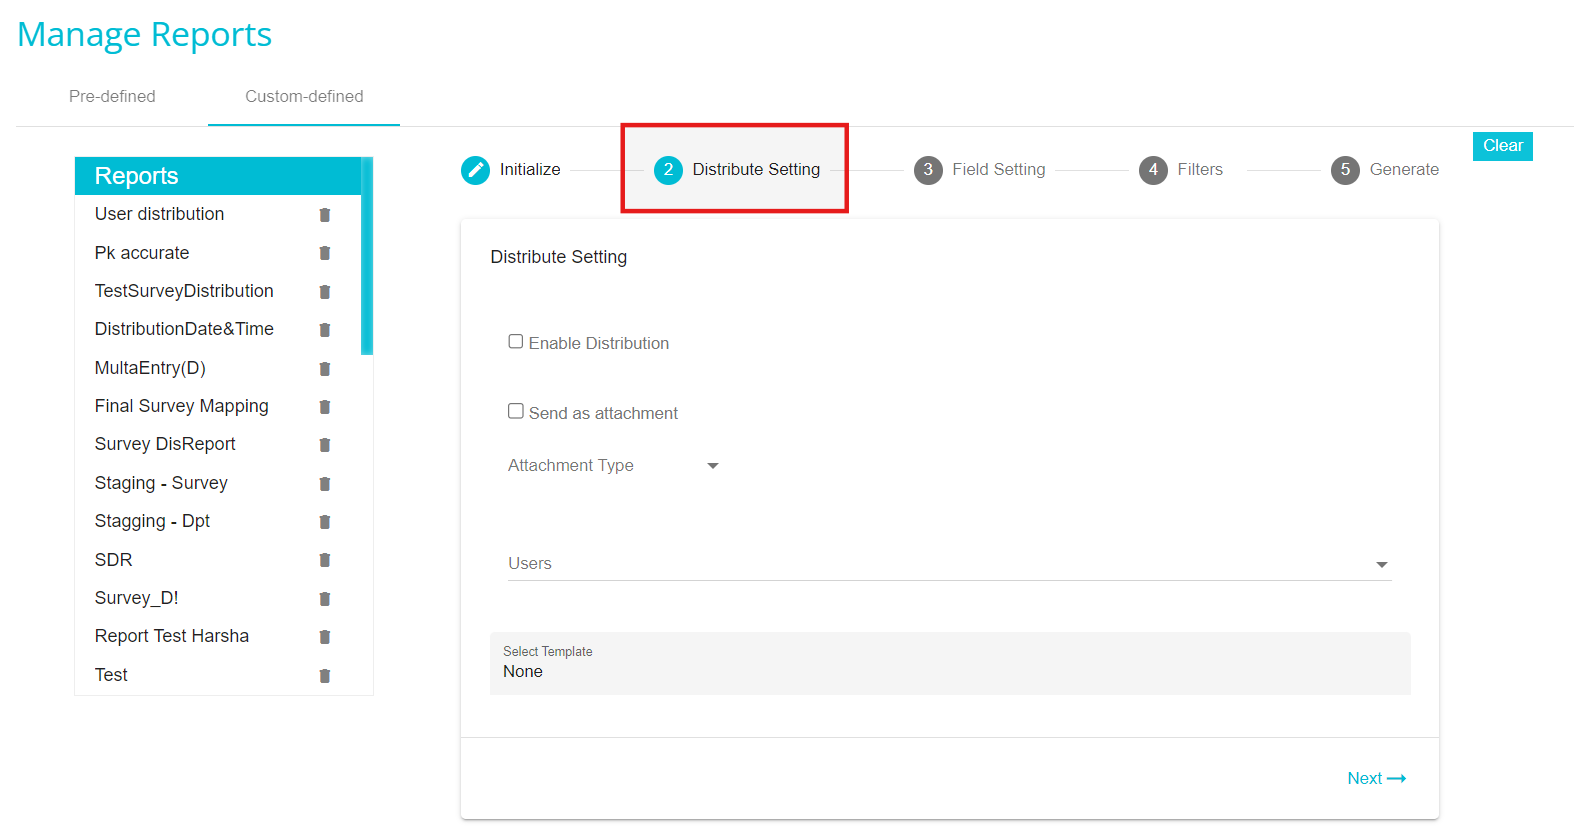
Enable Distribution: Check this box to automate the distribution. The report will be sent automatically to the selected users daily, hourly, weekly, monthly and so forth.
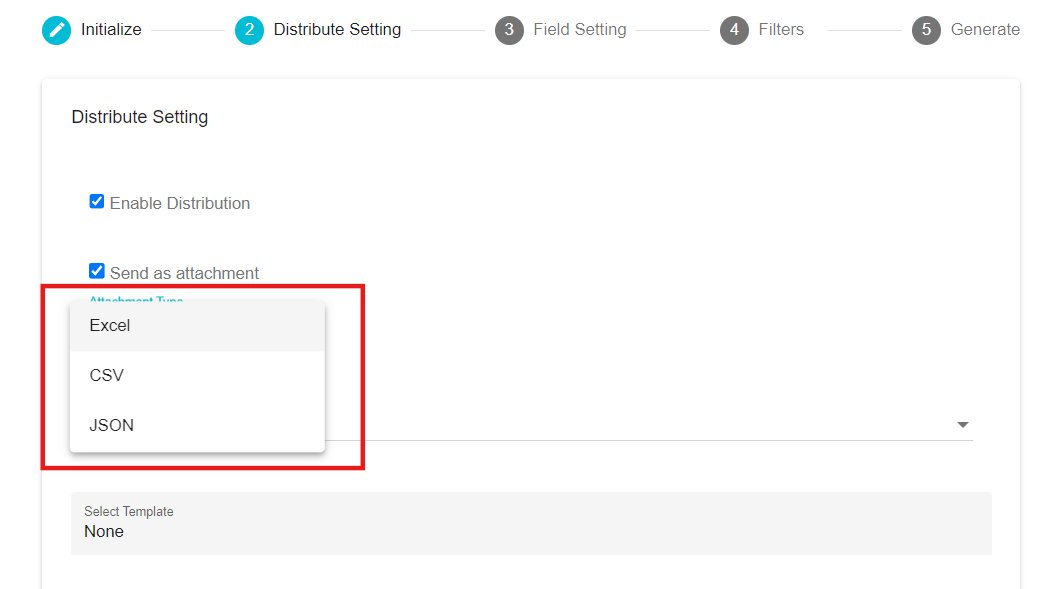
Send as attachment: Check this box to add the report as an attachment to the email
Attachment Type: From the drop-down menu select the file format of the report attachment; Excel, CSV or JSON
Users: Select the users to whom the report should be sent or distributed.
Select Template: Select the email template here. The templates here are defined in the Configure Email module. While configuring the email, the frequency with which it should be sent is also selected and the same is applied here, depending on the template selected. Different templates have different frequencies. If the frequency has not been configured, we can't see the frequency when the template is selected.
 To Configure Email Template for User Reports:
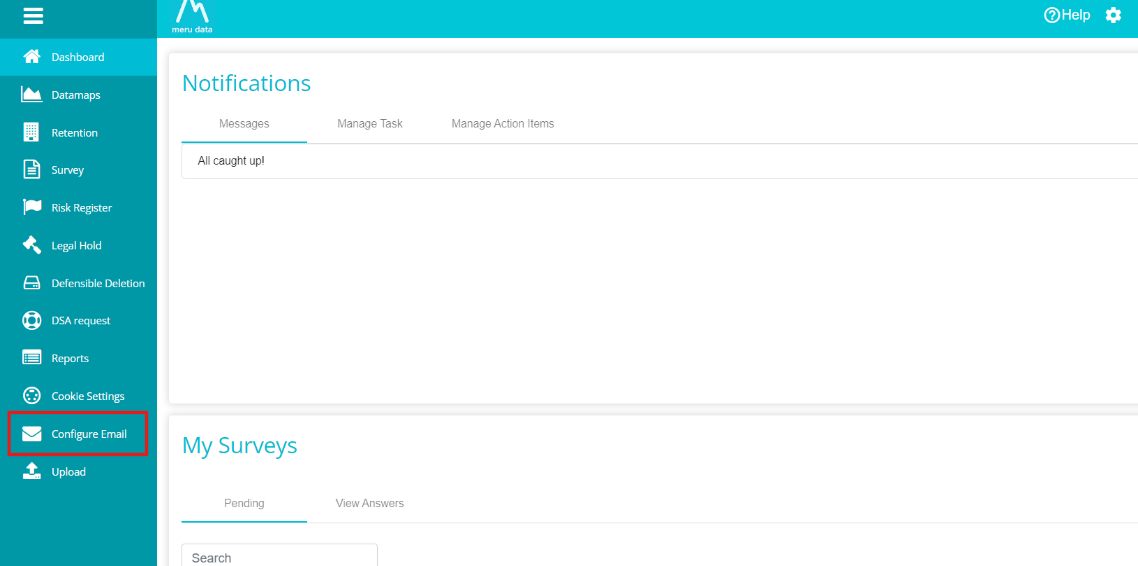
a. Click on Configure Email present on the Hamburger Menu. The menu can be found on the top left of your screen
b. To create a new template, click on the Add button located to the right of the 'Search Bar'

c. The Email configuration page displays multiple fields :

d. Fields Description:
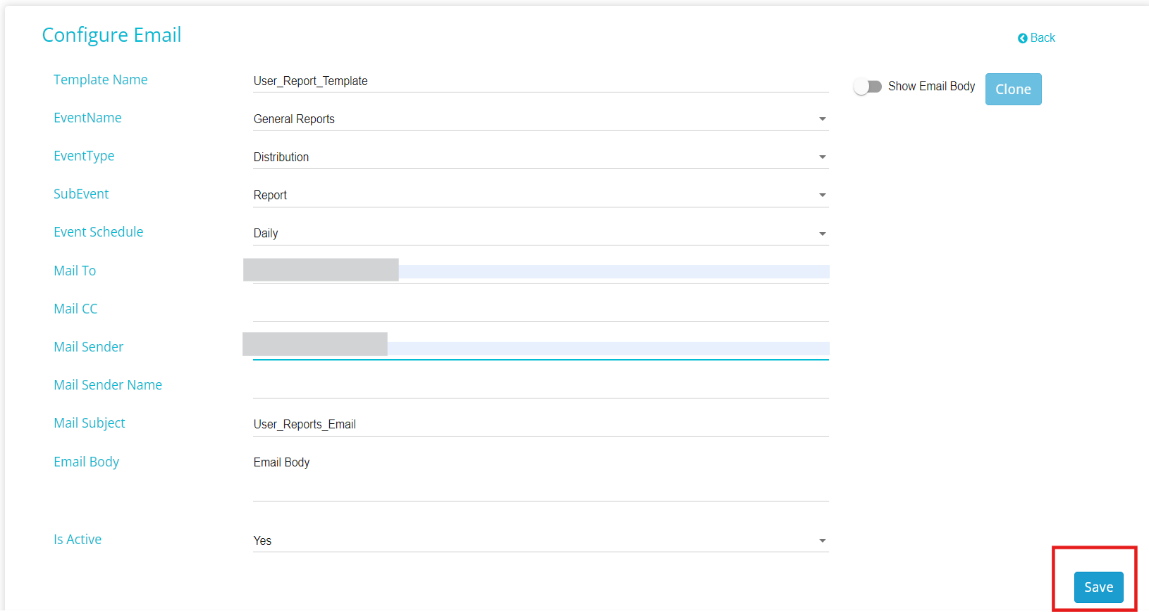
Template Name: You can title the email template when creating/editing it
EventName: Refers to the type of event or activity this email template will be integrated to, here you need to select "General Reports".
EventType: This is the subcategory of \"Event Name\". Based on the EventName you have selected, the EventType will need to be selected from the predefined dropdown. Here you need to select "Distribution".
SubEvent: This is the subcategory of \"EventType\". Based on the EventType you have selected, the SubEvent will need to be selected from the predefined dropdown. Here you need to select "Report".
Event Schedule: Here you can schedule the frequency with which the email will go out, i.e., Daily / Hourly / Monthly / NA (No Action: select NA to keep Event Schedule blank/invalid) / Weekly, etc
Mail Sender: This field is where the sender's email address is mentioned
Mail Sender Name: This field is to define the mail sender name.
Mail Subject: This field is to define the Email subject
Email Body: Here you can enter the content of your email. This can be defined either in text or HTML code
Is Active: This option will define whether the configured email template is active or not. E.g., if it is set to Yes, then the template will be Active, if it is set to No, then the template will be Inactive
e. Once all the required information has been filed in, click the Save button at the bottom right corner of the page. Now you can this template in the Distribute Setting by selecting the template which you created.
Next navigate to Field Setting or click on Next in Distribute setting screen.
Column Sorting: with this feature you can arrange the columns to appear in an ascending or descending order, depending on their values; alphabetically or numerically.
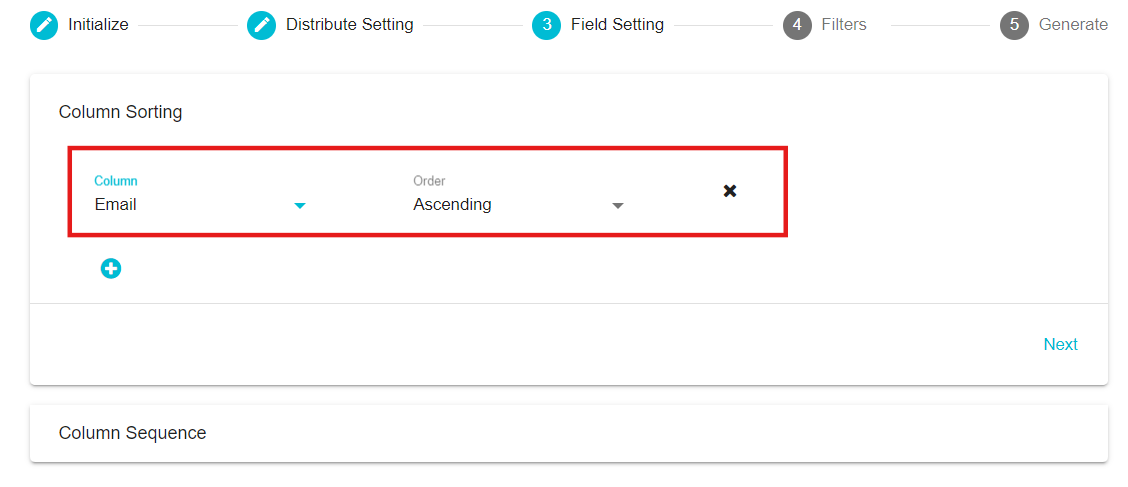
Column: From the selected columns, pick the column that you want arranged in an ascending/descending order.
Order: Select the order here; ascending or descending
Add button
 : Configure the order of as many columns as required by clicking the Add button.
Remove button
 : Remove the configuration of any column as required.
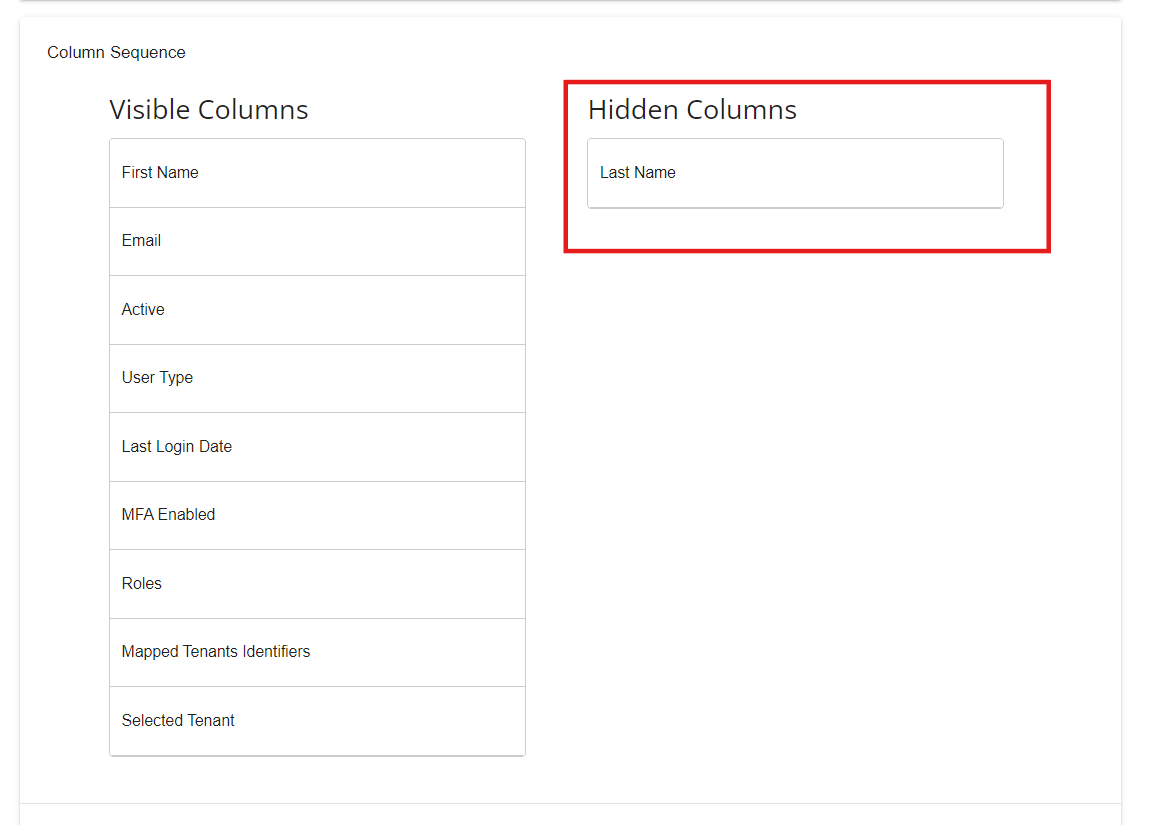
Column Sequence: under the Visible Columns section, drag and drop the columns to set the order of their display. Drag and drop any column to the Hidden Columns section to remove it from your report.Example: Last Name is placed under the Hidden columns.
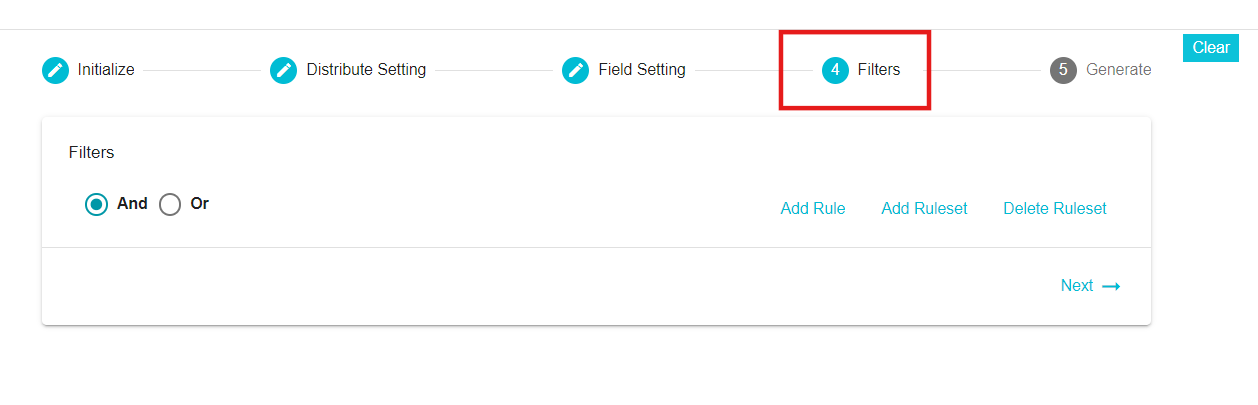
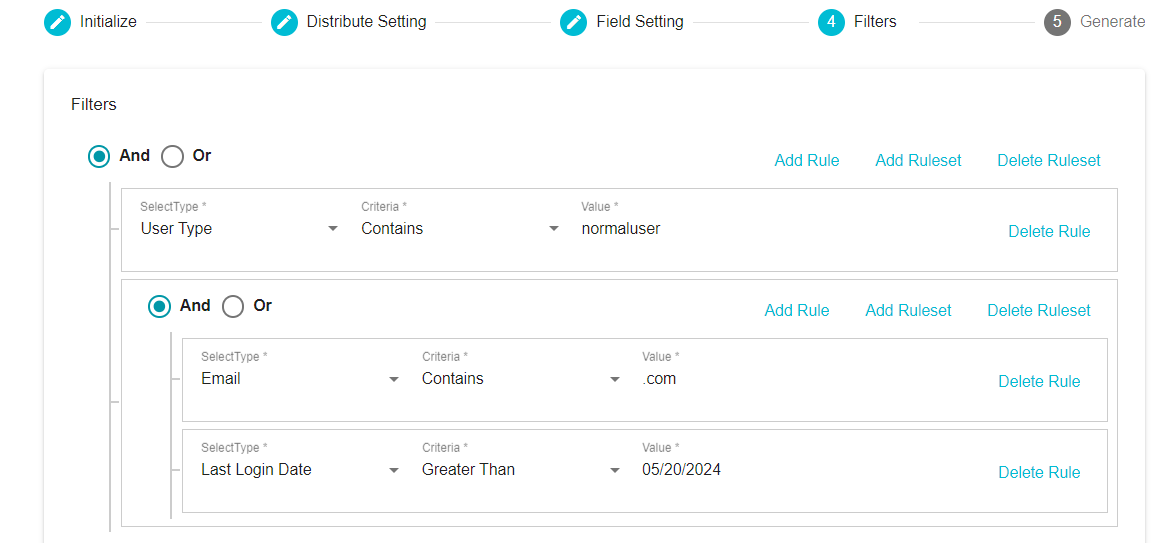
Next Navigate to the Filters Section or click on next in Field Setting screen.
Here you can configure the contents of your report. We have different column types like array, Boolean, string and Date. Each column has some specific criteria's and values to be configured. Here, you can Add Rule, Add Ruleset or Delete Ruleset.
Boolean type columns: "MFA Enabled" and "Active" are of type Boolean.
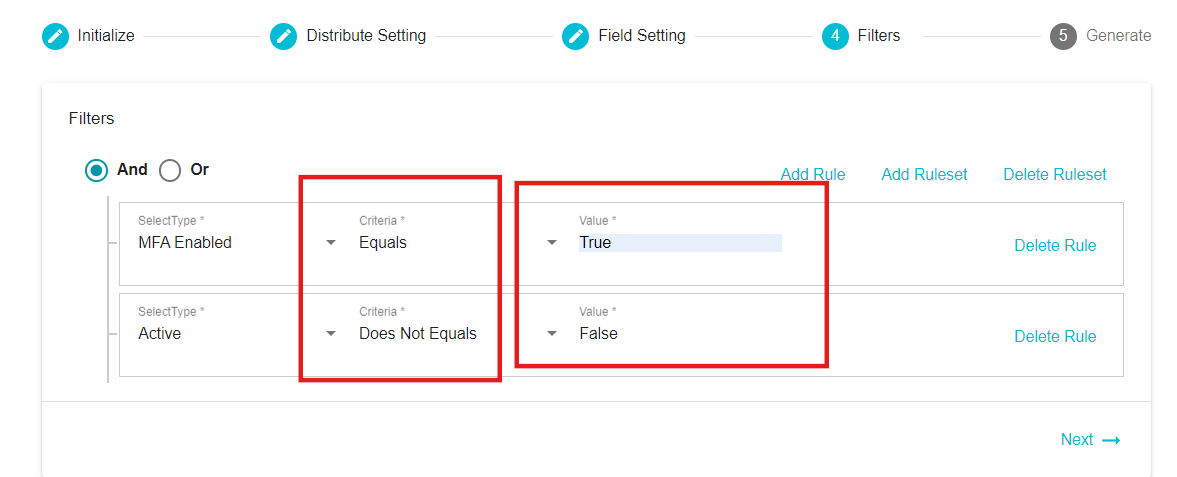
Criteria: It supports "Equals" and "Does Not Equals" under Criteria.
Value: It allows the values Either "True" or "False" and this is case insensitive.
Array type Columns: "Roles" and "Mapped tenant Identifiers" are of type Array.
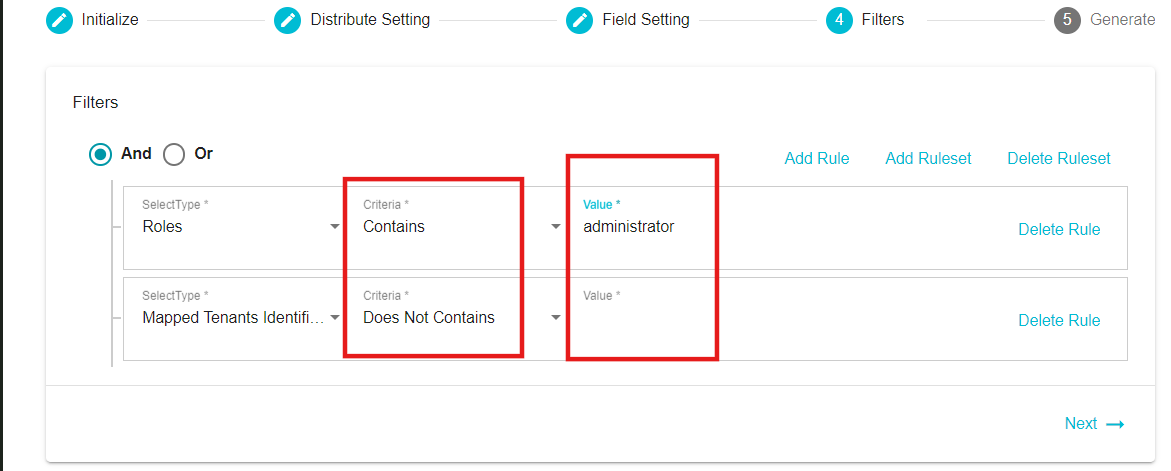
Criteria: It supports "Contains" and "Does Not Contains" under Criteria.
Value: Enter the value which you need to filter.
String type Columns: "First Name", "Last Name", "Email", "User Type" and "Selected Tenant" are of type String.
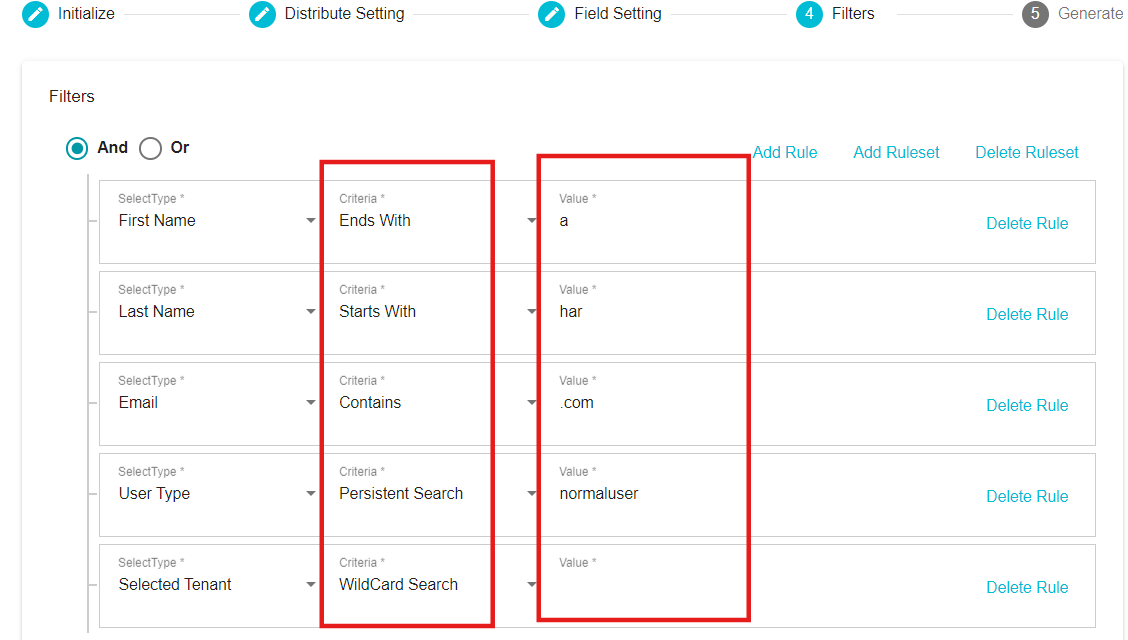
Criteria: It supports all the criteria except 'Greater Than' and 'Lesser Than'.
Value: Enter the value which you need to filter.
Date type Columns: "Last Login Date" is of type Date.
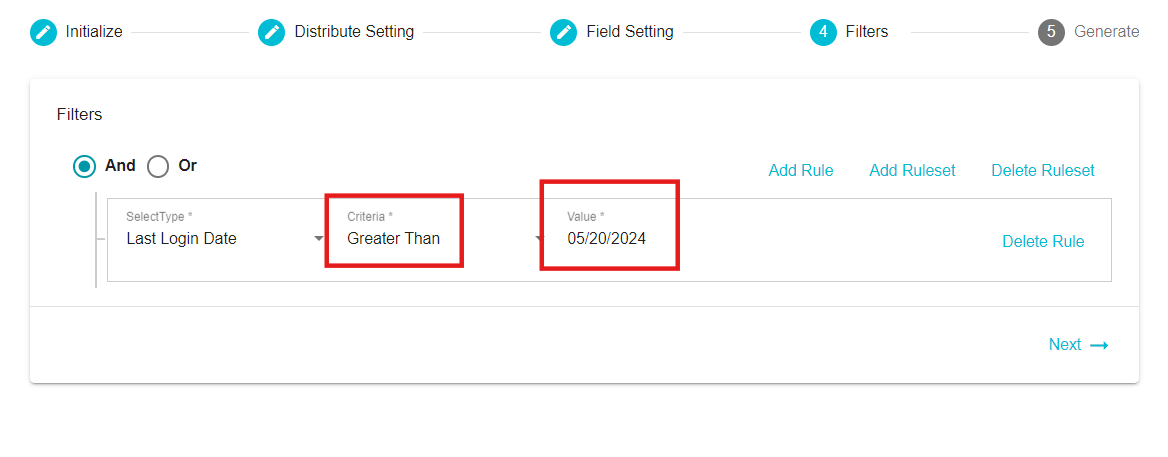
Criteria: It Supports "Greater Than" and "Lesser Than" under criteria.
Value: You need to Provide the Date in MM/DD/YYYY or MM-DD-YYYY format where MM-Month, DD-Date, YYYY-Year.
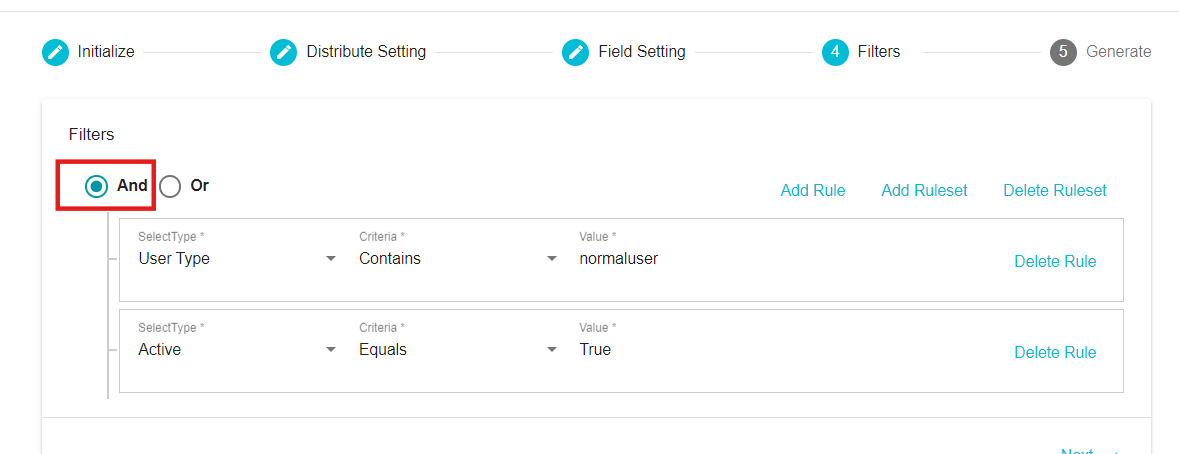
Filter Operations:
And: In And operation all the applied Rules should be True. Example: In the given example the report will contain the details of the users who are both "normalusers" and are active.
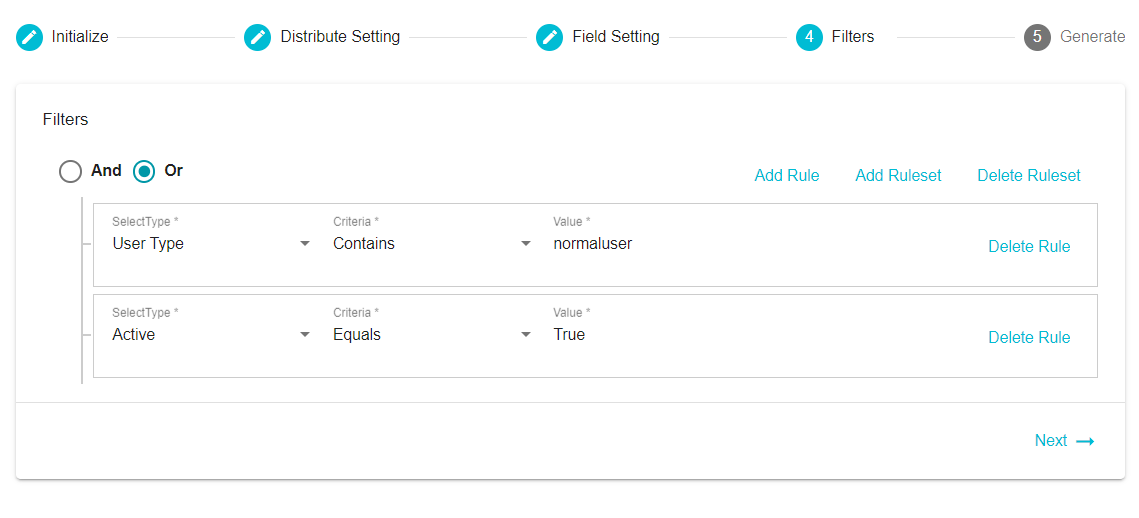
Or: In Or operation any of the applied rules can be True. Example: In the given example the report will contain the details of the users who are either "normalusers" or active.
Nested Rules: We can also Perform Nested filter Operations. Example: In the given example the report will contain the details of the user who are normal users and email contains .com and Last login date greater than 20^th^ May 2024.
Finally navigate to the Generate section or click on Next in the Filters screen.
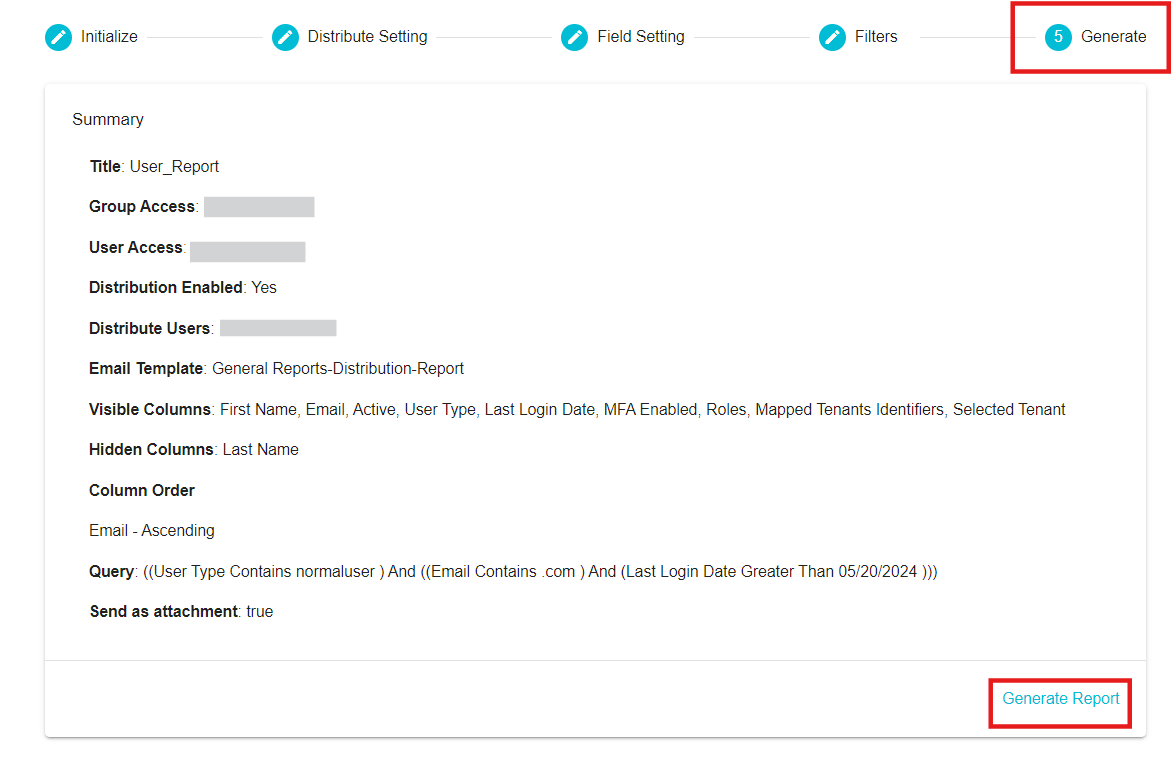
On this section, you can see the summary of the report's configuration. Changes can be made by going back to the sections of your choice and making the required changes. Finally, on clicking Generate Report, the configuration will be saved, the report will be available in the Reports Module for those users and groups with the permission, and the users selected in the Distribute Setting will receive a copy of the report on their email.
Viewing a User Report:
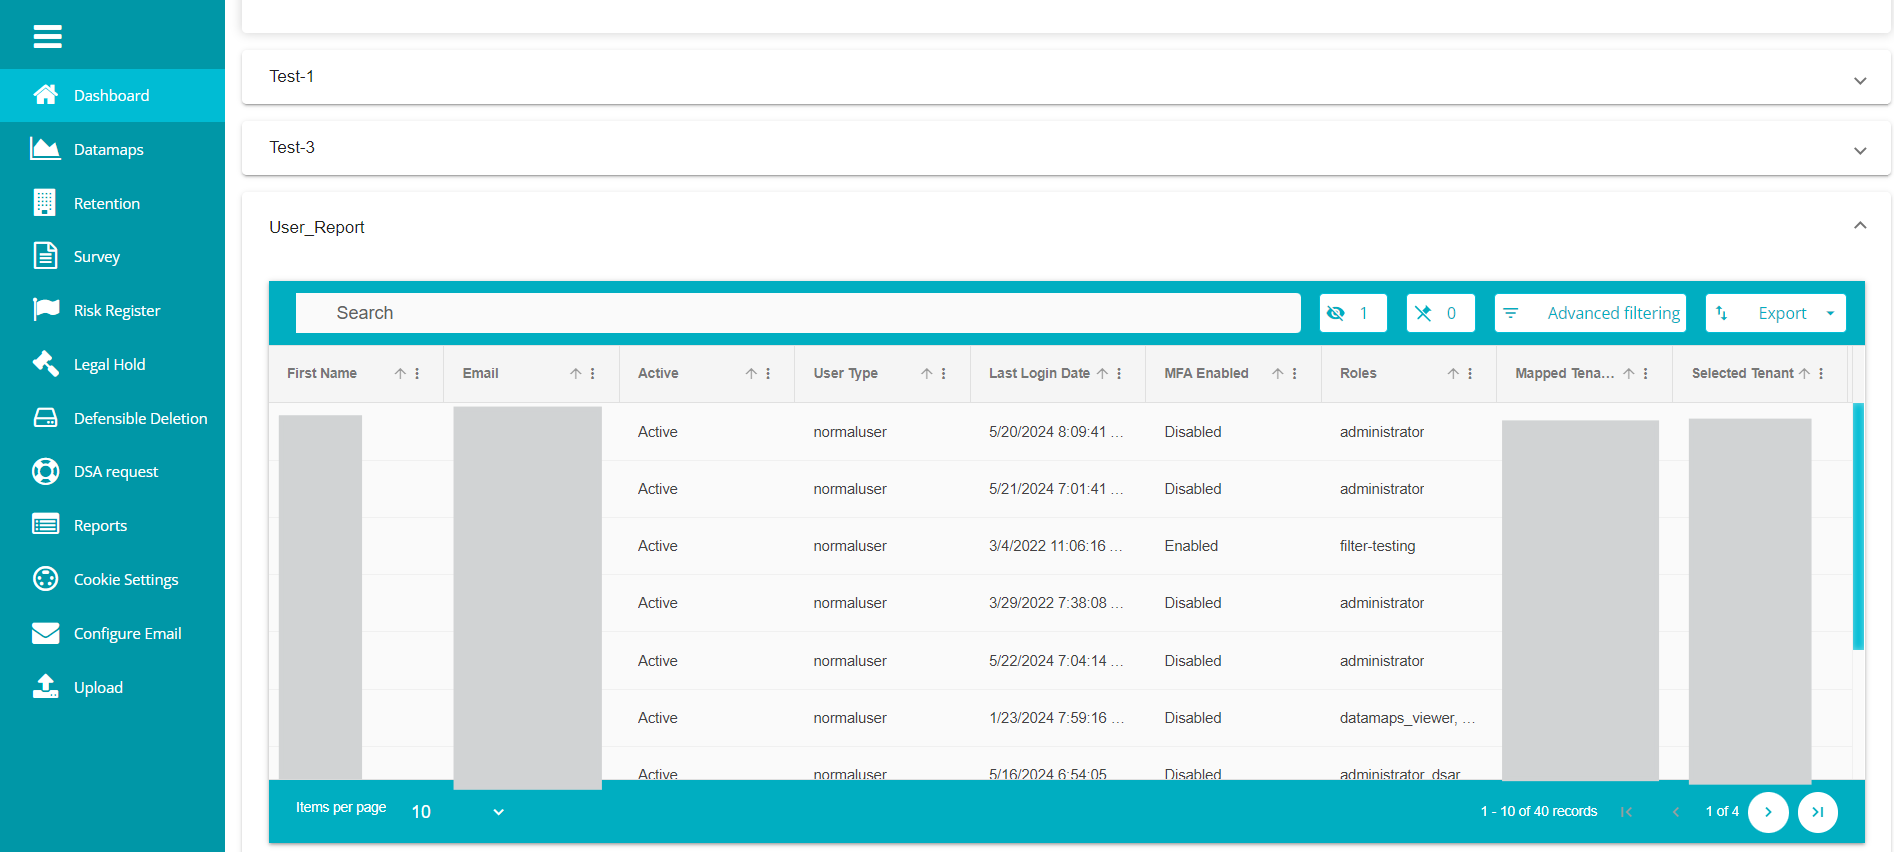
The User Reports can be found on the Reports module for those users and groups to whom the User Report permission was given while creating the report.
To view the Report, follow these steps:
Click on Reports present on the Hamburger Menu. The menu can be found on the top left of your screen.
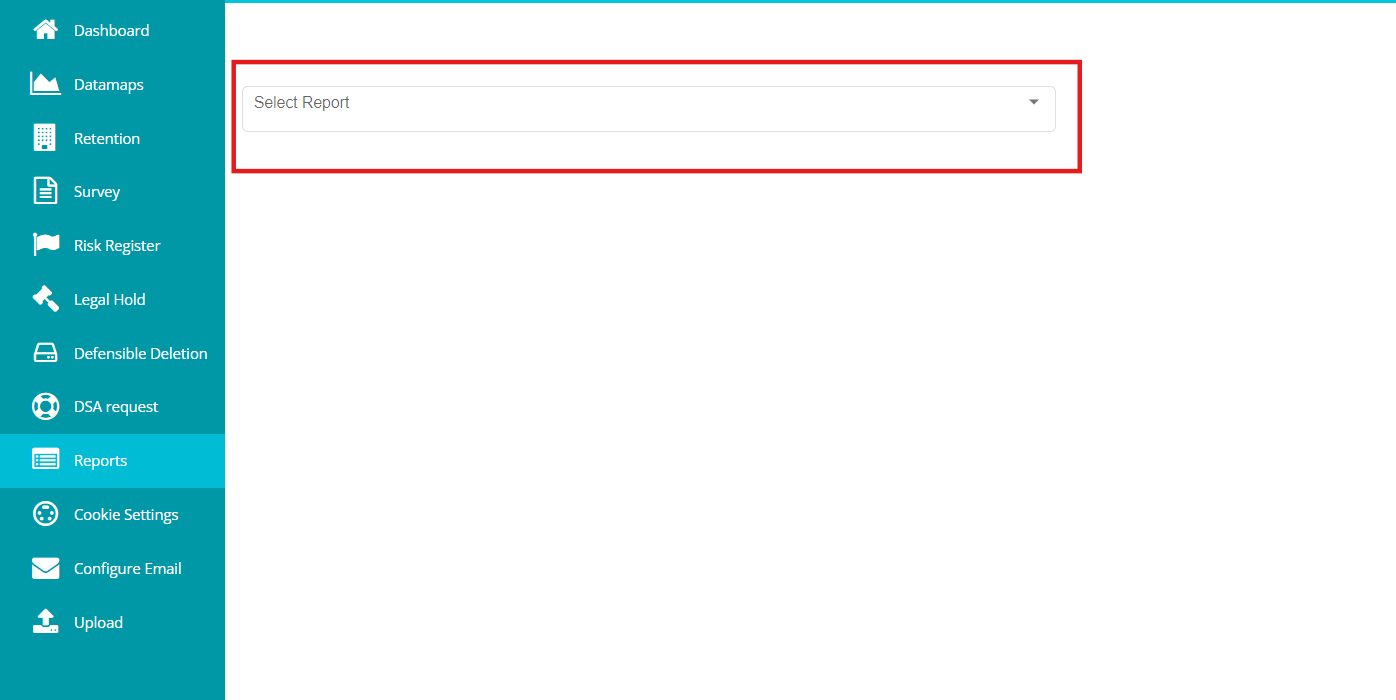
From the drop-down menu on the Report page, select User Report of your choice.
Note: Any User reports created will only be visible to those users and groups that have been given permission during creation of those specific reports.
You can now view the User Report
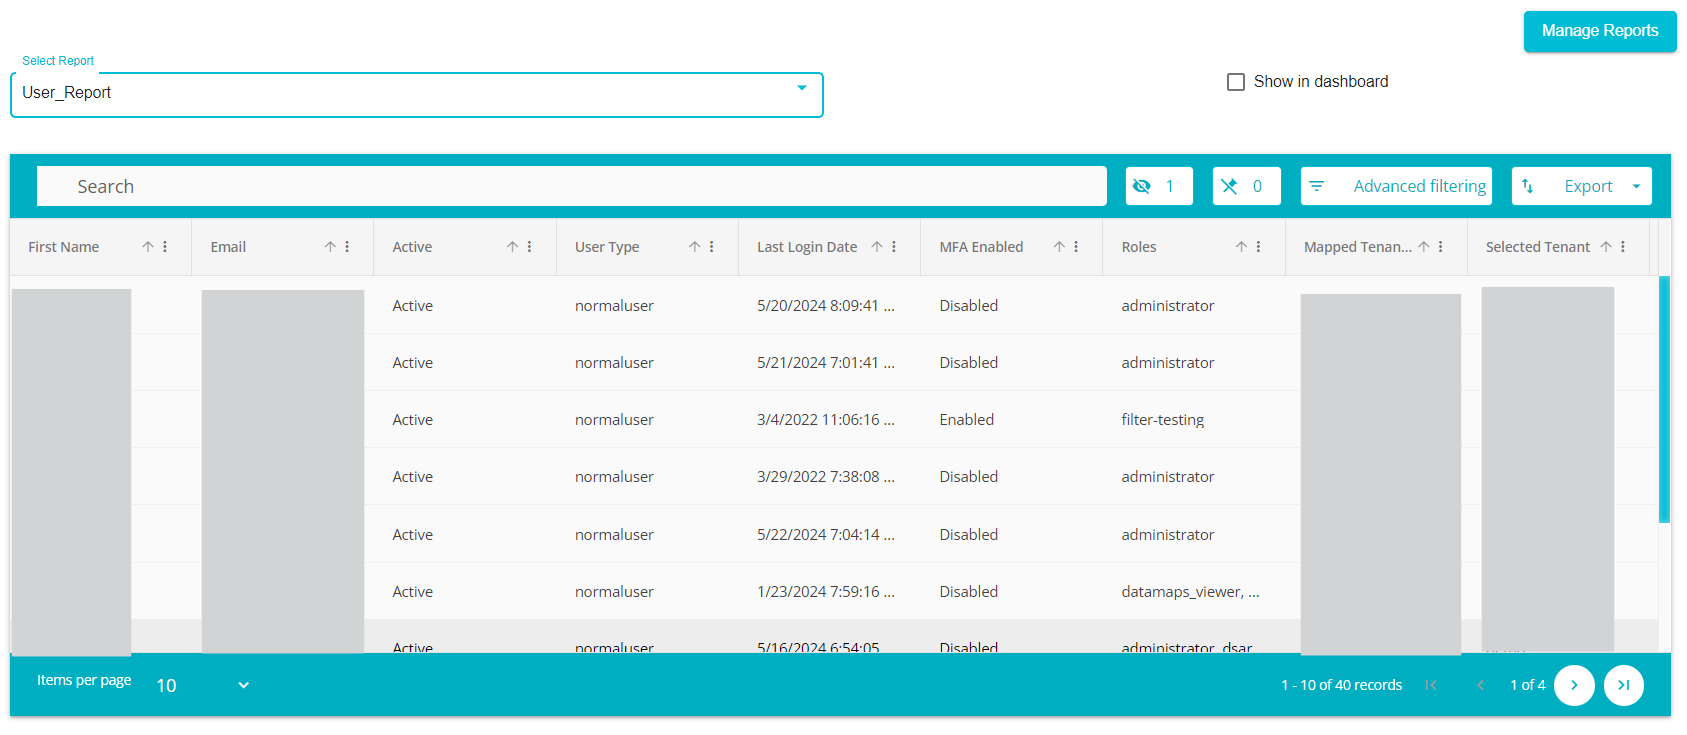
You can Export the report into Excel or CSV by Clicking on

You can also view the report in the dashboard by checking the box against Show in dashboard.

You need to scroll to the end in the dashboard to see the report.